Figuring the 8
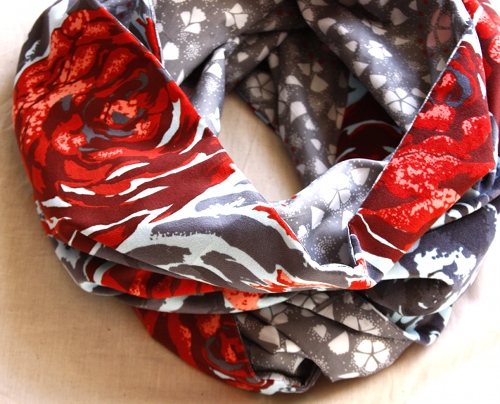
I named this the Figure 8 Scarf (we sell 18x72" pre-cuts here) because it reminded me of what I used to tell myself as a little girl to get the hang of twisting a rubberband around my hair to make a pony tail. Once the band is around once, you twist it, turning the band into a figure 8 before you pull the pony tail through the band a second time. Putting this full loop scarf around your neck is just the same. Plus figure 8 sounds winter-y and fun. Plus I can't do it on skates. So. Yea. While making a two sided sewn loop is a pretty easy thing, I thought I would save some of you from the never ending pull through to the right side that can happen depending on how you've put it together. C'mon. You've done it at least once on your life, right? Its the mystery of the loop. So here's how I do it with out depositing coins into the cuss jar.
* After making sure that each layer, in this case the voile and the velveteen, are trimmed to the exact same size, and also making sure that the width of the two pieces is uniform throughout the length, use a 1/2" seam allowance to sew right sides together along the two long edges
* Start and end each of these seams 1/2" away from the end of the length
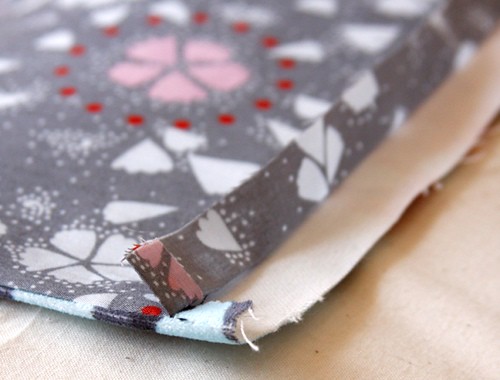
* Pull through to the right side and press
* Then press a 1/2" width of voile back against it's right side, as shown above, on both ends
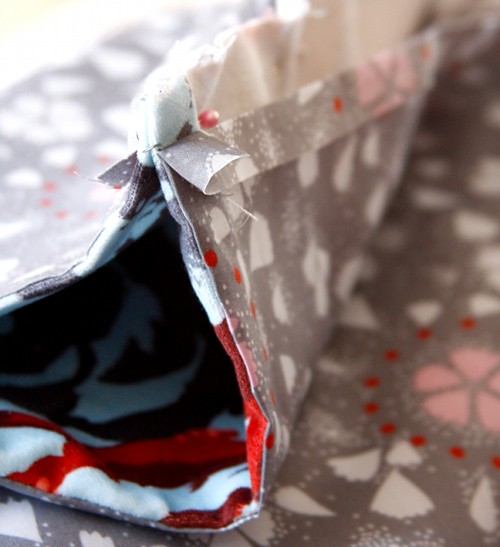
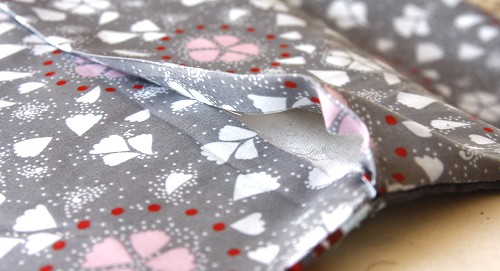
* Now fold the length, making sure its not twisted, with velveteen sides together, aligning their ends and pinning together as shown above- Make sure the voile is folded back and free of this pinned line, going only through the velveteen
* Use a 1/2" seam allowance to sew the velveteen ends together, keeping voile free and out of your stitch line
* Press the velveteen seam open as shown above and be sure to tuck the velveteen seam allowances at the side edges underneath the voile layer
With the voile now, you essentially reverse your previous pressed creases to begin enclosing the scarf seams by doing the following:
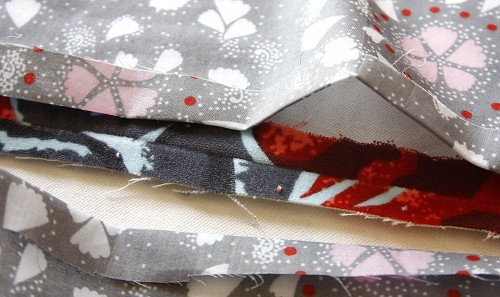
* Press one of the voile ends flat, and laying it over the open velveteen seam allowances, and underneath the other voile end
* Press the remaining voile end so that the crease folds in the other direction, against its wrong side, tucking it's raw edges in against the wrong/inner side of the scarf
* You can likely still see the previous crease line on the lower layer of the voile (notice above), lay the folded edge of the upper voile layer along this line
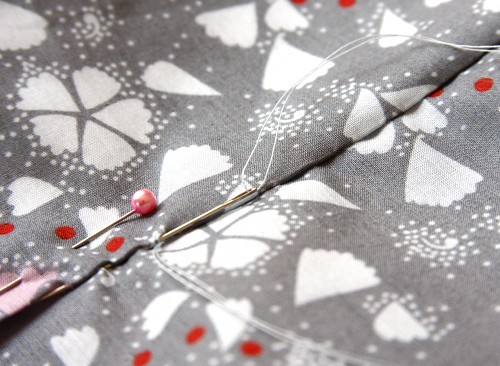
* Blind stitch the two layers of voile together, passing only through their layers, and not passing through the velveteen
Before you cuss me about the hand sewing, I chose to hand sew the finish for three reasons:
1- To do a good job of top stitching here, you would need to top stitch through all the layers, and make sure your stitch line lands right on the velveteen seam line in the appropriate position on the other side to look pretty- if that's a challenge for you, hand sewing is your friend
2- Usually the upper fabric gives a little more as you sew than the under fabric does, possibly more so when working with two substrates, and you would not want to stretch one beyond the other in this scenario especially, because you'd end up with a funky bubble (unlike just trimming off the difference if you were making a quilt block or at a hemline. I hate funky bubbles.)
3- Sewing only the voile to itself, lets the lined scarf loop stay open all the way though, keeping the velveteen layer free of the voile layer, so that subtle twists can happen more easily with the two fabrics, making it prettier to wear
So there.
Have fun.
xo, AM


Comments