The Stitch
I've put together photos + words that detail how I go about hand quilting. Quilting is such a vast topic with various approaches. This here is simply addressing the very stitch itself, as in how I start, stitch and finish each thread. To me there always seemed to be some mystery to the actual stitch and that classic motion of making it. Then I learned that you just have to begin. Right or wrong, start somewhere. I hope this post helps you do that. A lot of this info is in Handmade Beginnings (almost here!) but I didn't get the luxury of this much photo space in the book. So here you go, and thanks to Alexia for helping me take the pics! Have fun!
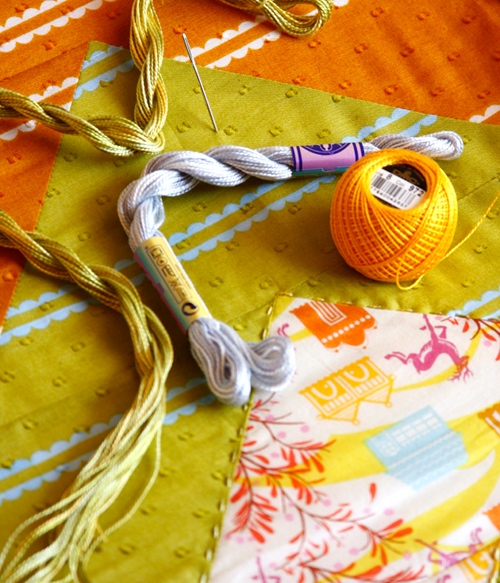
Alexia and I both like to use big chunky thread for hand quilting. I use the little Perle Cottons that come wound in a ball, usually a size 5, 7, or 8 (the smaller the number the thicker the thread). DMC also has these gorgeous skeins of variegated cotton that Alexia is using in these photos. As for needles, I use embroidery needles cause they're nice and sharp but has an open enough eye for threading the chunky threads. Crewel needles work well too, they are typically just a little shorter than embroidery needles.
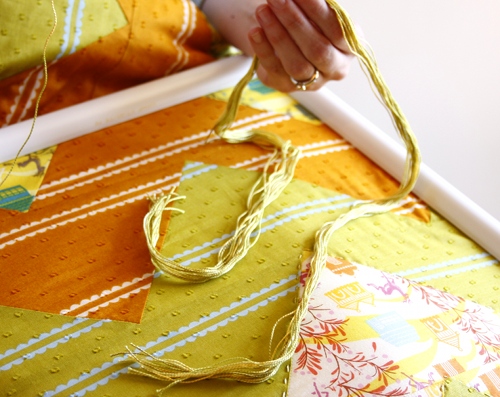
Alexia also very cleverly cuts through the skein loop at one end to create several perfect length pieces for your quilting all in one snip. This way you don't have to unwind and cut the perfect length each time. Smart girl.
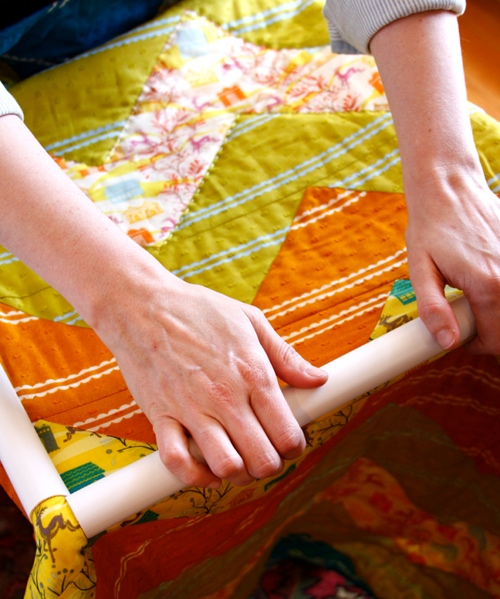
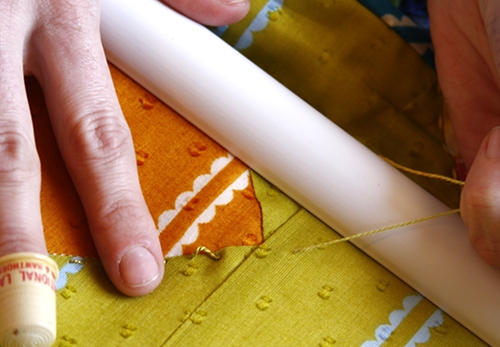
Many quilters like to use a quilting hoop or frame to keep all the layers nice and smooth as they stitch. I have a square laptop hoop that is made from plastic tubing that I find more useful than a round or oval frame that is harder to make use of once you get to the corners. I also like to sit up to a table when I quilt to have something to lay the frame against. Stitching will be easier with a frame if you don’t tighten the fabrics so much that you can’t press gently on the quilt layer. This square frame with the snap-on sides adjusts tautness easily by just twisting the fitted outer pieces in towards the center or out towards the edges. I feel like I am putting less stress on the quilt fabric with this process than I do when tugging fabric through a wooden hoop.
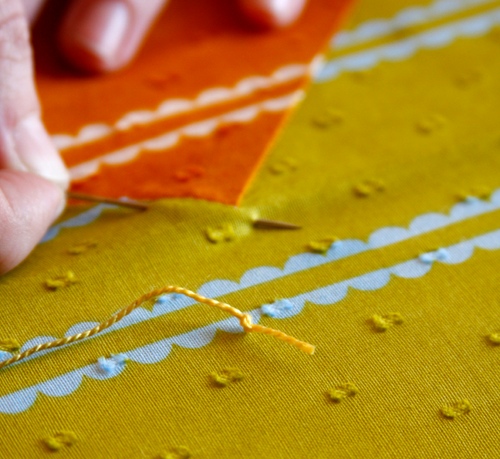
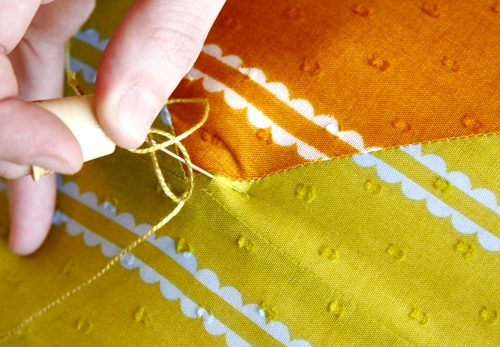
Whether you use a frame or not, you should always start at the center and work your way out with the quilt stitches. (And working stitches towards yourself tends to lessen the stress on your neck and shoulders.) To begin with, you shouldn’t be able to see any knots from the outside of the quilt, either the top or the back, so you’ll need to hide them. To do this, knot the thread within 1/4" to 1/2" of the end of the thread. Insert the needle into the quilt top just about 1/2" away from where you will begin your first stitch. Do not, however, push the needle through to the back, but instead come up where you want to begin stitching.
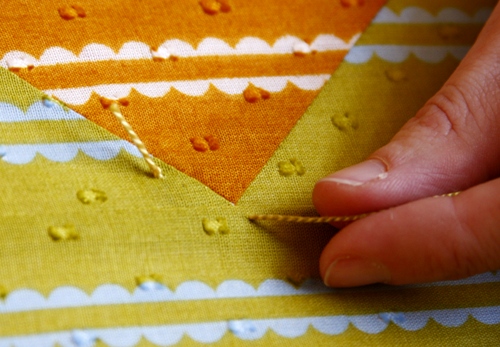
You can then pull the needle and thread slack through until the knot is sitting on the surface. Place your fingers on the end of the pulled-through thread slack and tug until the knot pops underneath the top layer. (It might take a few tries before you can get the knot to only pop under the layer once, and not pop it out through both layers! The secret is in grabbing the thread slack at the very base of where it is coming out of the quilt top.)
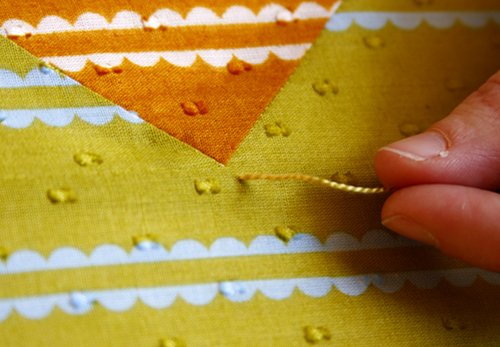
Once popped through the quilt top, the knot will then be hidden in the inner layers and not visible from either side.
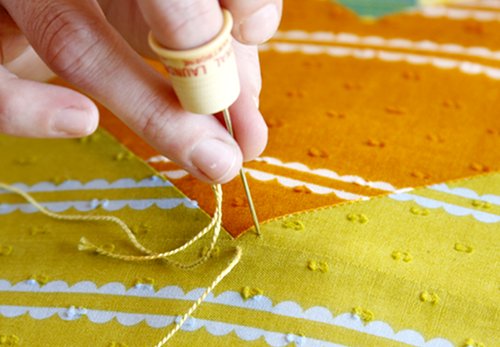
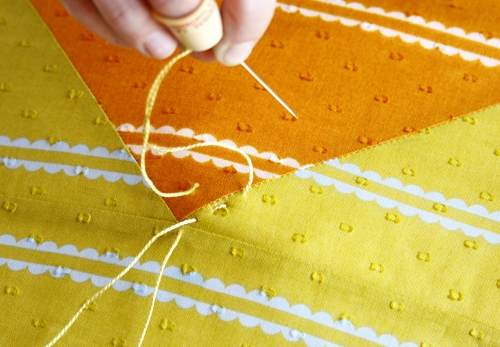
The goal of the simple running stitch is that it is generally straight and that each stitch is equal in length, equally spaced from other stitches, and equal in its distance from a seam if you are following along pieced seams. Enter the quilt top with the needle at a perfect vertical angle.
Then as soon as you feel the needle from underneath, angle the needle back up as close to a vertical line as you can to push the tip of the needle through. Focusing on this motion will help keep the stitches on the underside consistent with those on the quilt top.
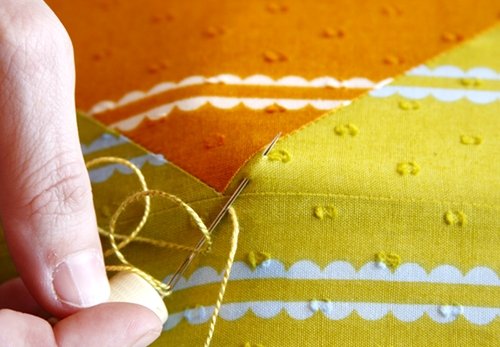
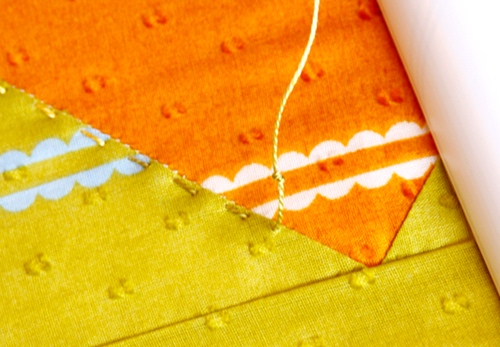
With practice, you will be able to load a few stitches onto the needle at once, in a sort of rocking motion. So you could try to head back down through the quilt with the tip of the needle again at a vertical angle. It's fine to go ahead and pull slack through after only one stitch. Take your time with your technique.
As shown above however, you only need to pull through enough slack to give you room to load a few more stitches (or one stitch) onto the needle. You don't have to pull through the entire length of thread with every stitch. This is particularly good to keep in mind if you are only going one stitch at a time. Conserve your time and energy by not pulling the whole length through every time, but maybe only every second or third time. And I definitely encourage going one stitch at a time! I can't stress that enough. You should not feel like you need to master several stitches at once from the beginning. The better your stitches look the better you will feel about returning to the task. So while loading several stitches with one hand above the quilt and one hand below the quilt is very efficient, use whatever method gives you the prettiest stitch for now. If you are performing one stitch at a time really well for a while, you will naturally begin to try a few more.
Stop stitching about an inch or two from the inside edges of the frame to prevent skewing the layers at all. Rather, continue to reposition the frame once you get that close. To make a finishing knot, the concept is similar to the beginning knot. When you are about to perform your last stitch into the quilt top, knot the ending slack of your thread about a stitch length (or 1/4") from the quilt top.
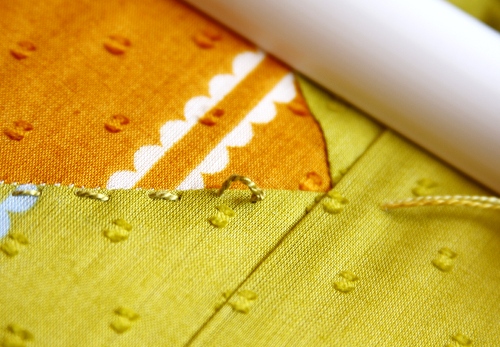
Insert the needle to finish the stitch, but just through the top and then back out the top again an inch or so away.
Pull the slack until the knot is lying against the top. Tug and pop the knot into the batting layer.
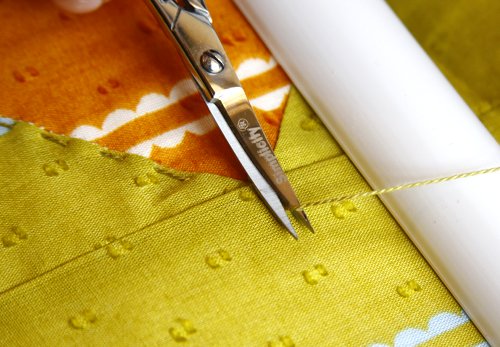
Cut the thread close to the top, being careful not to clip the quilt top in the process. A curved pair of embroidery scissors is perfect for this. To start the next thread, this whole process would begin again on the underside, picking up where your last stitch left off. And instead of doing a full stitch ending up at the underside again, you would just poke through to the top, where you would continue your quilting from the quilt top side.
Okay, so maybe I should be doing an egg dyeing tutorial today, but take what you can get! Speaking of, I need to go check my eggs. Busy week here of pre-Easter festivities coupled with some special little girl sewing which I'll share next week.
Happy Easter! xoxo, Anna
Alexia and I both like to use big chunky thread for hand quilting. I use the little Perle Cottons that come wound in a ball, usually a size 5, 7, or 8 (the smaller the number the thicker the thread). DMC also has these gorgeous skeins of variegated cotton that Alexia is using in these photos. As for needles, I use embroidery needles cause they're nice and sharp but has an open enough eye for threading the chunky threads. Crewel needles work well too, they are typically just a little shorter than embroidery needles.
Alexia also very cleverly cuts through the skein loop at one end to create several perfect length pieces for your quilting all in one snip. This way you don't have to unwind and cut the perfect length each time. Smart girl.
Many quilters like to use a quilting hoop or frame to keep all the layers nice and smooth as they stitch. I have a square laptop hoop that is made from plastic tubing that I find more useful than a round or oval frame that is harder to make use of once you get to the corners. I also like to sit up to a table when I quilt to have something to lay the frame against. Stitching will be easier with a frame if you don’t tighten the fabrics so much that you can’t press gently on the quilt layer. This square frame with the snap-on sides adjusts tautness easily by just twisting the fitted outer pieces in towards the center or out towards the edges. I feel like I am putting less stress on the quilt fabric with this process than I do when tugging fabric through a wooden hoop.
Whether you use a frame or not, you should always start at the center and work your way out with the quilt stitches. (And working stitches towards yourself tends to lessen the stress on your neck and shoulders.) To begin with, you shouldn’t be able to see any knots from the outside of the quilt, either the top or the back, so you’ll need to hide them. To do this, knot the thread within 1/4" to 1/2" of the end of the thread. Insert the needle into the quilt top just about 1/2" away from where you will begin your first stitch. Do not, however, push the needle through to the back, but instead come up where you want to begin stitching.
You can then pull the needle and thread slack through until the knot is sitting on the surface. Place your fingers on the end of the pulled-through thread slack and tug until the knot pops underneath the top layer. (It might take a few tries before you can get the knot to only pop under the layer once, and not pop it out through both layers! The secret is in grabbing the thread slack at the very base of where it is coming out of the quilt top.)
Once popped through the quilt top, the knot will then be hidden in the inner layers and not visible from either side.
The goal of the simple running stitch is that it is generally straight and that each stitch is equal in length, equally spaced from other stitches, and equal in its distance from a seam if you are following along pieced seams. Enter the quilt top with the needle at a perfect vertical angle.
Then as soon as you feel the needle from underneath, angle the needle back up as close to a vertical line as you can to push the tip of the needle through. Focusing on this motion will help keep the stitches on the underside consistent with those on the quilt top.
With practice, you will be able to load a few stitches onto the needle at once, in a sort of rocking motion. So you could try to head back down through the quilt with the tip of the needle again at a vertical angle. It's fine to go ahead and pull slack through after only one stitch. Take your time with your technique.
As shown above however, you only need to pull through enough slack to give you room to load a few more stitches (or one stitch) onto the needle. You don't have to pull through the entire length of thread with every stitch. This is particularly good to keep in mind if you are only going one stitch at a time. Conserve your time and energy by not pulling the whole length through every time, but maybe only every second or third time. And I definitely encourage going one stitch at a time! I can't stress that enough. You should not feel like you need to master several stitches at once from the beginning. The better your stitches look the better you will feel about returning to the task. So while loading several stitches with one hand above the quilt and one hand below the quilt is very efficient, use whatever method gives you the prettiest stitch for now. If you are performing one stitch at a time really well for a while, you will naturally begin to try a few more.
Stop stitching about an inch or two from the inside edges of the frame to prevent skewing the layers at all. Rather, continue to reposition the frame once you get that close. To make a finishing knot, the concept is similar to the beginning knot. When you are about to perform your last stitch into the quilt top, knot the ending slack of your thread about a stitch length (or 1/4") from the quilt top.
Insert the needle to finish the stitch, but just through the top and then back out the top again an inch or so away.
Pull the slack until the knot is lying against the top. Tug and pop the knot into the batting layer.
Cut the thread close to the top, being careful not to clip the quilt top in the process. A curved pair of embroidery scissors is perfect for this. To start the next thread, this whole process would begin again on the underside, picking up where your last stitch left off. And instead of doing a full stitch ending up at the underside again, you would just poke through to the top, where you would continue your quilting from the quilt top side.
Okay, so maybe I should be doing an egg dyeing tutorial today, but take what you can get! Speaking of, I need to go check my eggs. Busy week here of pre-Easter festivities coupled with some special little girl sewing which I'll share next week.
Happy Easter! xoxo, Anna


Comments