Quilting Questions & Anna Answers
Martha asked... (and so did Abby) this is really, really, helpful. where do you get a quilting frame like that?
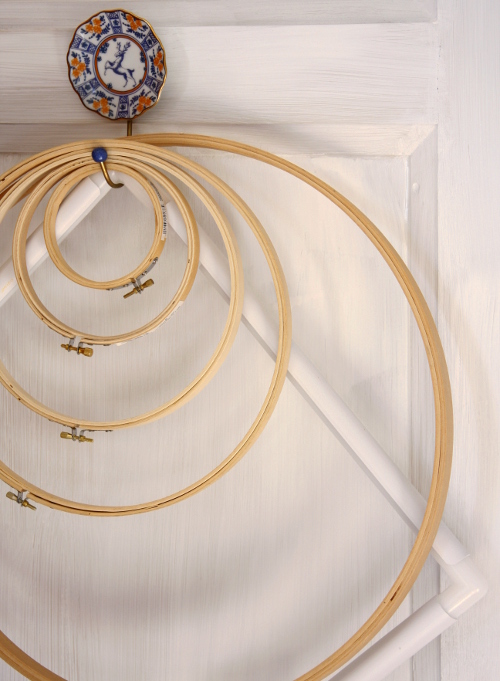
Anna Answers: I got my square frame at a local quilt shop in Franklin called Stitcher's Garden. I don't still have the packaging but I am pretty sure that I have whats called a Q-snap frame. Its a very simple design with curved removable clamps on each of the four sides. It pops apart at the corners too, which makes it easy to travel around with. They seem to come in several sizes, and even a stand up floor model (which I've never tried). Mine is 17 x 17".
Kandra asked... (and so did Nima) What a great tute! Now, I wonder - what size/type needle do you use and any tips on picking out a good thimble?
Anna Answers: Hand quilting needles are very, very tiny and not suitable for use with the embroidery threads that I've shown in my post. I use embroidery needles, and sometimes crewel needles. I try to use the smallest needle size possible that still allows me to thread the eye without breaking the house cussing rules. To be very honest with you, I have a whole array of needles in my pin cushion and I will typically just grab what it is there, and seems to work the best. I would encourage you to buy a multi-pack of sizes and experiment. To be clear, the smallest holes you can poke into your quilt, the better.
With regards to thimbles, I jump between a few different types, but mostly use a traditional thimble for my "push through" finger. I do also have a rubber type thimble that I like (see that here). But sometimes, just like with garden gloves, I get annoyed and feel more efficient by not using the thimble and feeling the needle in my fingers, even though this gets my fingers sore after a while. In the tutorial where I describe how you poke the needle from the top through to the back until you feel the tip of the needle from the underside before angling the needle back up again through the top to make a stitch, feeling that needle tip from the underside against your fingers can be a little uncomfortable without the help of a little sticky finger tip thimble that I use sometimes (see that here). But again, once I got the hang of just barely poking the needle through to the back, and therefore not really poking myself so much, it becomes less necessary for me to use this type of tip thimble and more efficient to just feel the needle.
L Johnson asked...Thank you so much for sharing these pictures and tutorial. I have been contemplating using floss on a black and white wall hanging quilt that i am just about finished with. Would it be wrong to use black on the white with black fabric pieces and white on the black fabric pieces? All the quilting I have seen is in one solid color thread.
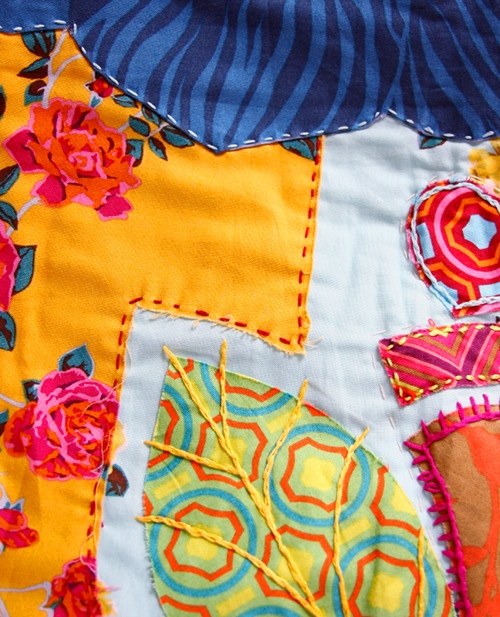
Anna Answers: Well, without looking specifically at your quilt its hard to make recommendations. I have often employed the use of several colors of floss in one quilt, very often changing the colors based on what color fabric I am stitching into. I would guess that a black and white quilt might already have plenty of contrast, so as long as you think the opposite color stitching style would enhance the design and not compete with it, I say go for it. Its also good to take into consideration what your backing color(s) is and how the stitches will look on the back side. Personally when its one solid color on the backing, I love how different color stitches look. The example shown above shows one of my quilts where I combined appliqueing a large floral element with the quilting stitch step. So instead of needle turn applique, I appliqued and hand quilted in the same step. Other stitches shown on this quilt top are not hand quilting (as in going through all layers) but just embroidery stitches created in the quilt top making.
ana asked ...That's a really useful post - thanks! Do you have any shots of what the stitches look like from the back? It would be useful to have an idea of how they look for comparison to the front.
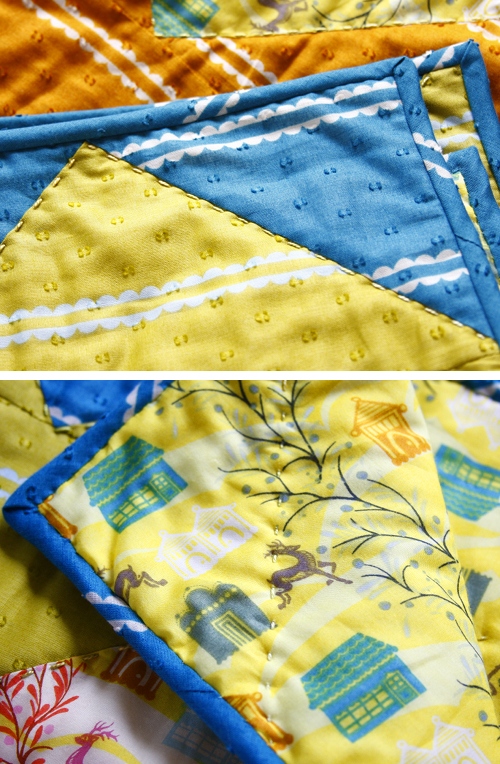
Anna Answers: Have a look above. In general, my stitches look the same from the back side as they do from the front side, if not just a tiny bit smaller. They are smaller due to the needle not always entering the fabric at a perfect perpendicular to the quilt angle. This is why its important to get your needle angle as straight up and down as you can so that the stitches on the back are the same size as the stitches on the front. Practice. Practice. Practice. Even just one stitch at a time. Practice.

Robyn asked...Do you stitch the front and then stitch the back in between the stitches ... I'm confused
Jennifer asked...Great pictures and tutorial! One question though, how do I follow the line on the back of the quilt? I can use the pieces on the front to keep my stitches straight, but what about when I turn it over??
Anna Answers: I am answering the two questions above together because I think that they are really asking the same thing, and that is about the actual explicit mechanics of the stitch. While trying not to sound too obvious and also trying to answer what I think the questions are, the stitching style that I have shown is one that passes through all three quilt layers (quilt top, batting, backing) at once from the top of the quilt down through to the back and back up again. The above is a quick rendering that I did, that I hope illustrates this a little better. Also you should be able to perform the stitches with the quilt top facing you the whole time and not flipping over to stitch from the backing side.
If there is patchwork on the back of the quilt as well, obviously you might take that into consideration when choosing how to make your stitching design. You don't have to follow the patchwork lines from the quilt top, but could do a general all over design instead. You can choose something as simple as straight rows of stitching or there are handquilting guides that help you temporarily stencil a stitch pattern onto your quilt top. I just happen to like following the patchwork on the quilt top in some way.
Kris asked...Thanks for the beautiful and well done tute! You didn't mention basting....do you just start in the middle and not bother basting? I'd also like to know what size needle you choose with what size perle cottons. Thanks again!!
Anna Answers: For full size quilts, about twin size and up, I first safety pin the layers together (usually with the layers on the floor), then I hand baste with super large stitches both horizontally and vertically in several rows about 8 inches apart (sometimes still on the floor for this step which is kind of back-breaking so often I move to a large table or studio counter) then I quilt beginning in the center and before I do the binding.
Now, for smaller, as in baby-size quilts, I very often go straight from safety pinning to hand quilting, and skip the basting step. I just move the pins as I go to keep them out of the way of the frame. I have even been known to go ahead and bind a small quilt before I do the hand quilting, which was the case for both of the recent zigzag baby quilts. And sometimes I go about quilting without the frame too (GASP!). In other words, experimenting is a good thing to find your comfort zone. And while its important to get some things right to end up with something that you love, none of the perfection techniques should be so adhered to that you aren't enjoying it, or are too afraid to begin.
(To answer needle question see second question above.)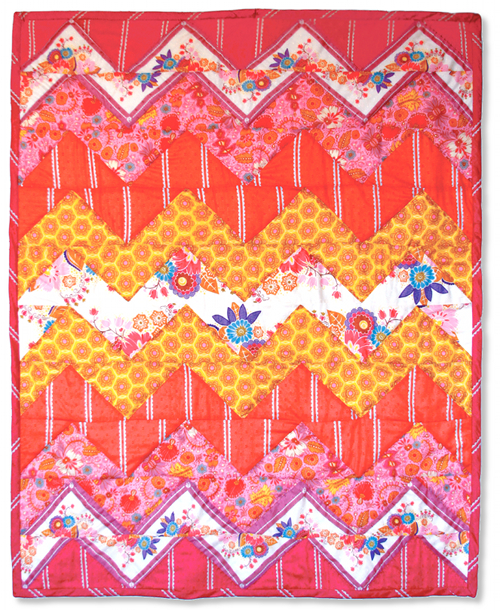
And now- how about a baby Folk Dance quilt pattern!? Click on the link to download a 3 page pdf. Print page 2 on the back side of page 1, and then page 3 is your templates. Oh and all the pages should be landscape oriented for printing. We really want to make quilt kits for these, but the exact fabrics (namely the dobby dots) are becoming quite scarce here in the studio. In fact, the price of these goods went up so much to reproduce them, that I've decided to have the Square Dance and Pastry Line prints redone on the smooth voile substrate. Hopefully they'll be available end of May.
This was fun. Thanks for the dialogue, and happy stitching!!! xoxo, Anna Maria


Comments